Wednesday, December 30, 2009

Rachel Sumner: Straw Panpipe


How To Make A Panpipe
  1. Cut three or four straws so that you have five pieces varying in length. These are your playing straws.
  2. Roll your modeling clay into pea-sized balls (slightly larger than the opening of the straws). Plug the bottom of each straw and be sure that it is completely plugged. You can check by holding the open end of the straw up to your eye and look for light coming through. If you see light you haven't sealed it well enough.
  3. Arrange the playing straws in order of length with the shortest straw at one end and the longest at the other end. Be sure that all the clay plugs are on the bottom and the open ends on the top. Also, make sure they are level across the top.
  4. Cut four two inch pieces of straw for spacers. Place a two-inch spacer straw between each of the six playing straws. Line the spacer straws up 1/4 inch lower than the six pieces varying in length.
  5. Place a strip of tape around all of the straws even with one end of the spacer straws. Place another strip of tap around all of the straws even with the other end of the spacer straws.
  6. Decorate your panpipe and put your name on it.
How Does The Panpipe Work?
When you blow across the top of the panpipe, it makes the air inside the straw vibrate. Small air spaces vibrate more rapidly than large air spaces. When there is very little air in the panpipe, you produce a high note. When there is more air, the note is lower.
Tips On Playing Your Panpipe
Hold your panpipe upright witht eh open end of the plastic air column on your lower lip. Extend your upper lip and blow gently across the top of the straws. If you blow too hard you can begin to feel a little dizzy. Warning: If you EVER feel dizzy while trying to play your baster stop immediately, and take a break.
If You Still Can't Get Sound
  1. If your clay has not sealed the bottom fully you will not be able to get sound. Try holding your finger or thumb over the bottom opening where you have the clay and blow gently. Be sure that you are covering the entire hole!
  2. Practice blowing across the top  of a bottle until you get sound. Once you master playing a bottle, try you panpipe again.
  3. You can also fold the bottom of the straw up and tape each end to close the bottom end.
*This information was provided by Rachel Sumner

Monday, December 28, 2009

Rachel Sumner: Turkey Baster


Fill your baster bulb with water by putting the open end under a slow running faucet until it reaches the top of the bulb or try to remove the bulb, fill it and replace it. You may have to experiment with both filling techniques to see which one words best for you and your baster. Do not fill the plastic air column of the baster.

Hold your baster upright with the open end of the plastic air column on your lower lip. Extend your upper lip and blow gently across the top of the baster. If yo blow too hard you could begin to feel a little dizzy.


Gently squeeze the bulb of the baster near the bottom to change the level of the water and the pitch of your baster. If you squeeze near the top, you may cause the water to leak from the baster bulb. (If you do get a leaky baster, put some duct tape over the edge of the bulb so that it seals the bulb to the column better.)

Experiment with the baster sounds. Create different sounds by considering:

  • Speed: fast, medium, and slow
  • Length of the breath: Short quick breaths (staccato notes) or notes that are held out (sustained notes), or connected notes that slide from one to the other (legato) by keeping the breath flowing.
  • High sounds ( to represent little  creatures like mince)
  • Low sounds (to represent big creatures like trolls)


Students as DES loved the turkey basters.

*Turkey baster informations was given by Rachel Sumner

Rachel Sumner: Spoons

Rachel Sumner demonstrating how to put  spoons together.

Wrap a rubber band on the handle of one wooden spoon and then wrap another rubber band in the same location of the handle as the first spoon. The rubber bands will create a space between the spoons. Place the wooden spoons back-to-back


Tip on holding your spoons: Be careful not hold on to your spoons too high up the handle as you try to play or you will mute them. Keep your fingers relaxed as you hold the spoons and tap.


Rachel says playing percussion with spoons is a joyous use of everyday materials. They sound a little like castanets. The sound is produced when the "bowls" of the spoons are clicked against one another.

Place the bowls of the spoons back-to-back. You will need to make sure that the bowls are separated from each other. They must be loose so they can make a clacking sound as they are tapped. One way to do this is to hold them with your index finger between the handles of the two spoons, wrap the rest of your fingers around the handle of the bottom spoon and put your thumb over the spoon on top.

Rachel Sumner also let students know they can use any type of  spoons from their kitchen at home. You can play teaspoons, tablespoons, or any other set of wooden, plastic or metal spoons.


Tuesday, December 22, 2009

Rachel Sumner: Washtub Bass


Directions: Drill a hole in the center of the tub and also in the pole about a foot from one end. Put the nuts, bolts, and washers through in this order: eye bolt, nut, washer, tub  * ( or pole), washer, nut. Tighten the nuts securely. The optional but recommended part is to drill a hole in the little piece of wood and put it on the inside of the tub at * because sometimes over time the whole thing will pull right through the tub if you don't. However, too big a pice of wood interferes with the vibrations and sound.


At the other end of the pole from the bolt, cut or file a notch across the round end like this ----( l l  ) about half an inch deep. ( I usually file it or get a neighbor to cut it for me). This will fit over the bottom rim of the tub to keep the pole from slipping off while in use.


To Play: Set the edge of the pole on the bottom rim and tie the line/string securely, adjusting it to the height and tension you desire. This usually takes some adjusting, so don't tie fancy knots until you have it where you want it. Then you are ready to go!! The sound carries better if you play on a hard surface and put something like a thick book under the edge of the tub away from you so that the entire upper rim is not flush against the floor. Plant your foot and the notched end of the pole on the lower side and start plucking! If you get unwanted buzzing around the area where the washers are, a couple of Dr. Scholl corn pads will take care of it nicely.


* Written by Rachel Sumner


The String Instrument Family

A string instrument is constructed with a tightly stretched cord or wire that sounds when plucked, struck or played with a bow. Violin, harp, lute, bass, guitar, and bajo are examples of string instruments.

You make a canjo. It may remind you of a cup and string telephone except you use two tin cans and fishing line.

The pitch of stringed instruments can be changed by:
1. Stretching or loosening the string
2. Shortening or lengthening the string
3. Thickness or thinness of the string.

*This material was used from the lesson plans of Rachel Sumner

Wednesday, December 16, 2009

Rachel Sumner: Canjos


How to make a Canjo:
1. Poke a hole with your thin nail into the center of the bottom of each can.
2. Measure each musician's arm from the fingertip to the elbow and cut a piece of fishing line to that length. (Rachel likes to have children work together to help each other measure and cut. Demonstrate how to do this with a partner and then provide gentle and encouraging guidance when needed.
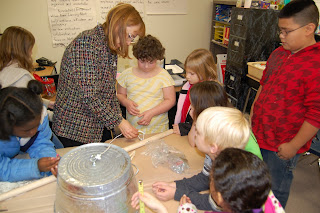
3. Thread the fishing line through the hole from the outside of the can. Tie a double knot at the end of the fishing line inside the can.
4. Thread the other end of the fishing line through the hole of the other can and tie a double knot at the end of the fishing line inside the can.


How to play the canjo:

1. Place one can under your dominant arm with the open side of the can facing the back of your body.

2. Hold the other can in your other hand. The open side of the can will face away from your body.

3. Boing the string with your dominant hand.

4. Stretch the string by pulling the can in your hand as you keep tension to hold the can under your dominant arm so that you keep the can under your arm. The more you stretch the string, the higher the pitch.

5. Loosen the tension on the string and notice how the pitch changes becoming lower the more you loosen the string.

Tuesday, December 15, 2009

3rd Grade: Pitch


Third grade students found out if the pitch of the notes from the water glasses will go up or down when you take water out. We filled several mason jars with water at different water levels. We tapped the side of each glass bottle gently with a spoon. We recorded our data. After we recorded our data, students took turns playing the water glasses and having the class guess the tune they played a.k.a Name That Tune.